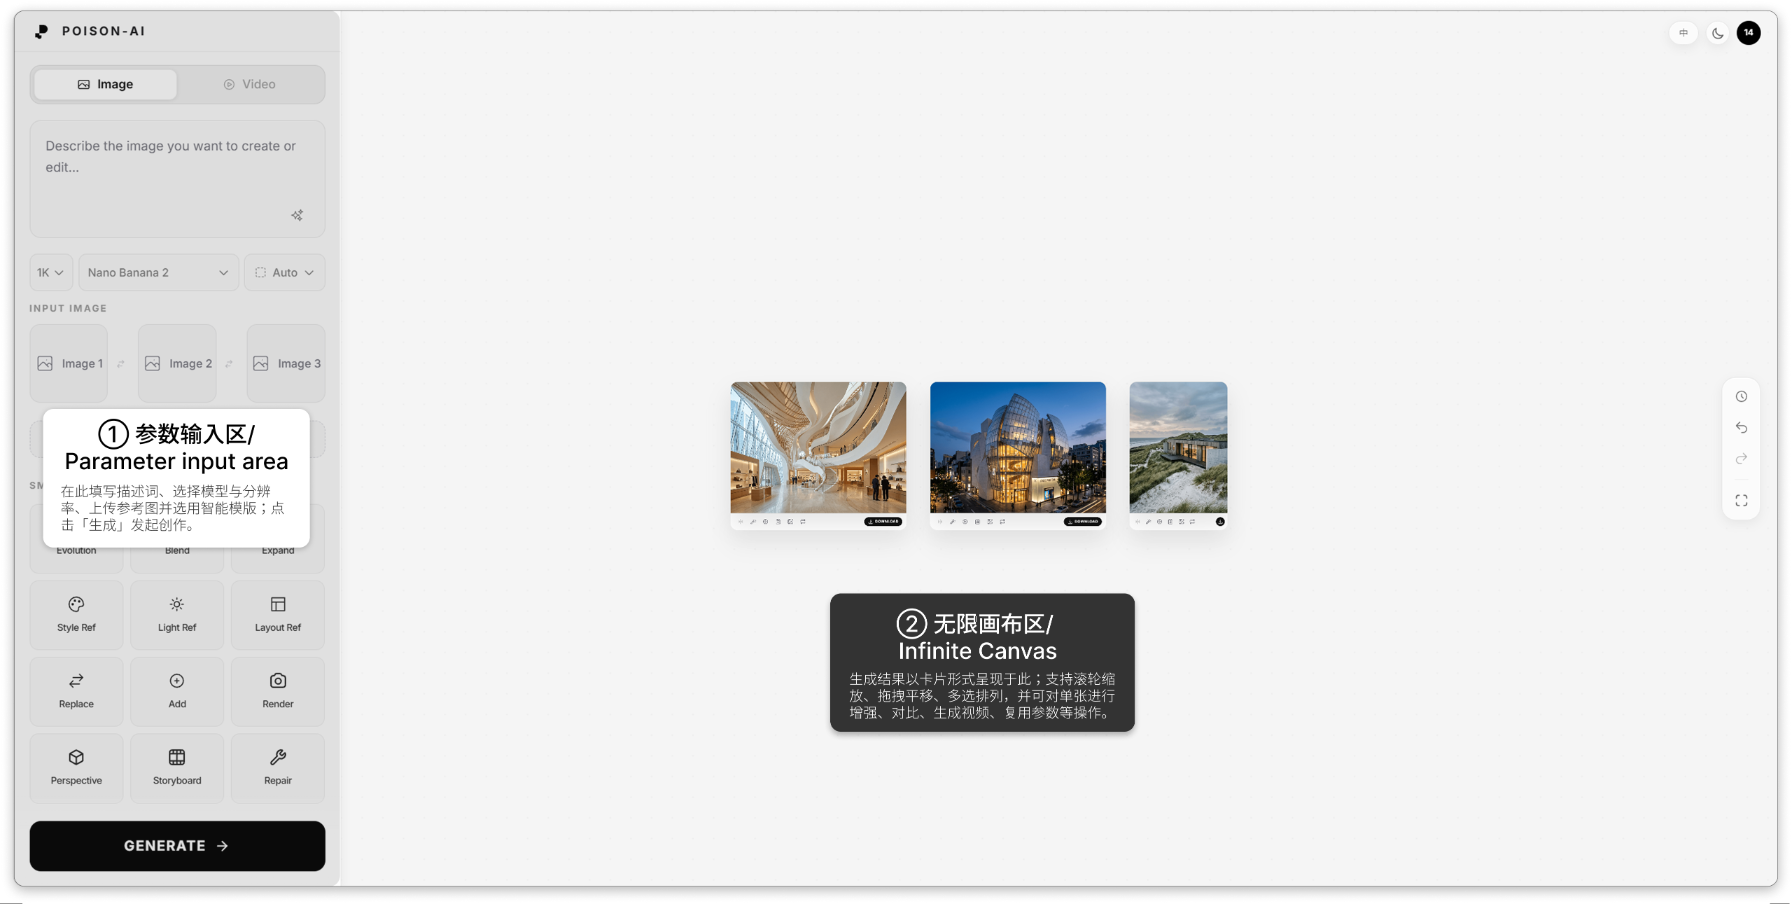
Your first generation
For your first run, follow these steps; you can finish an AI image in a few minutes.
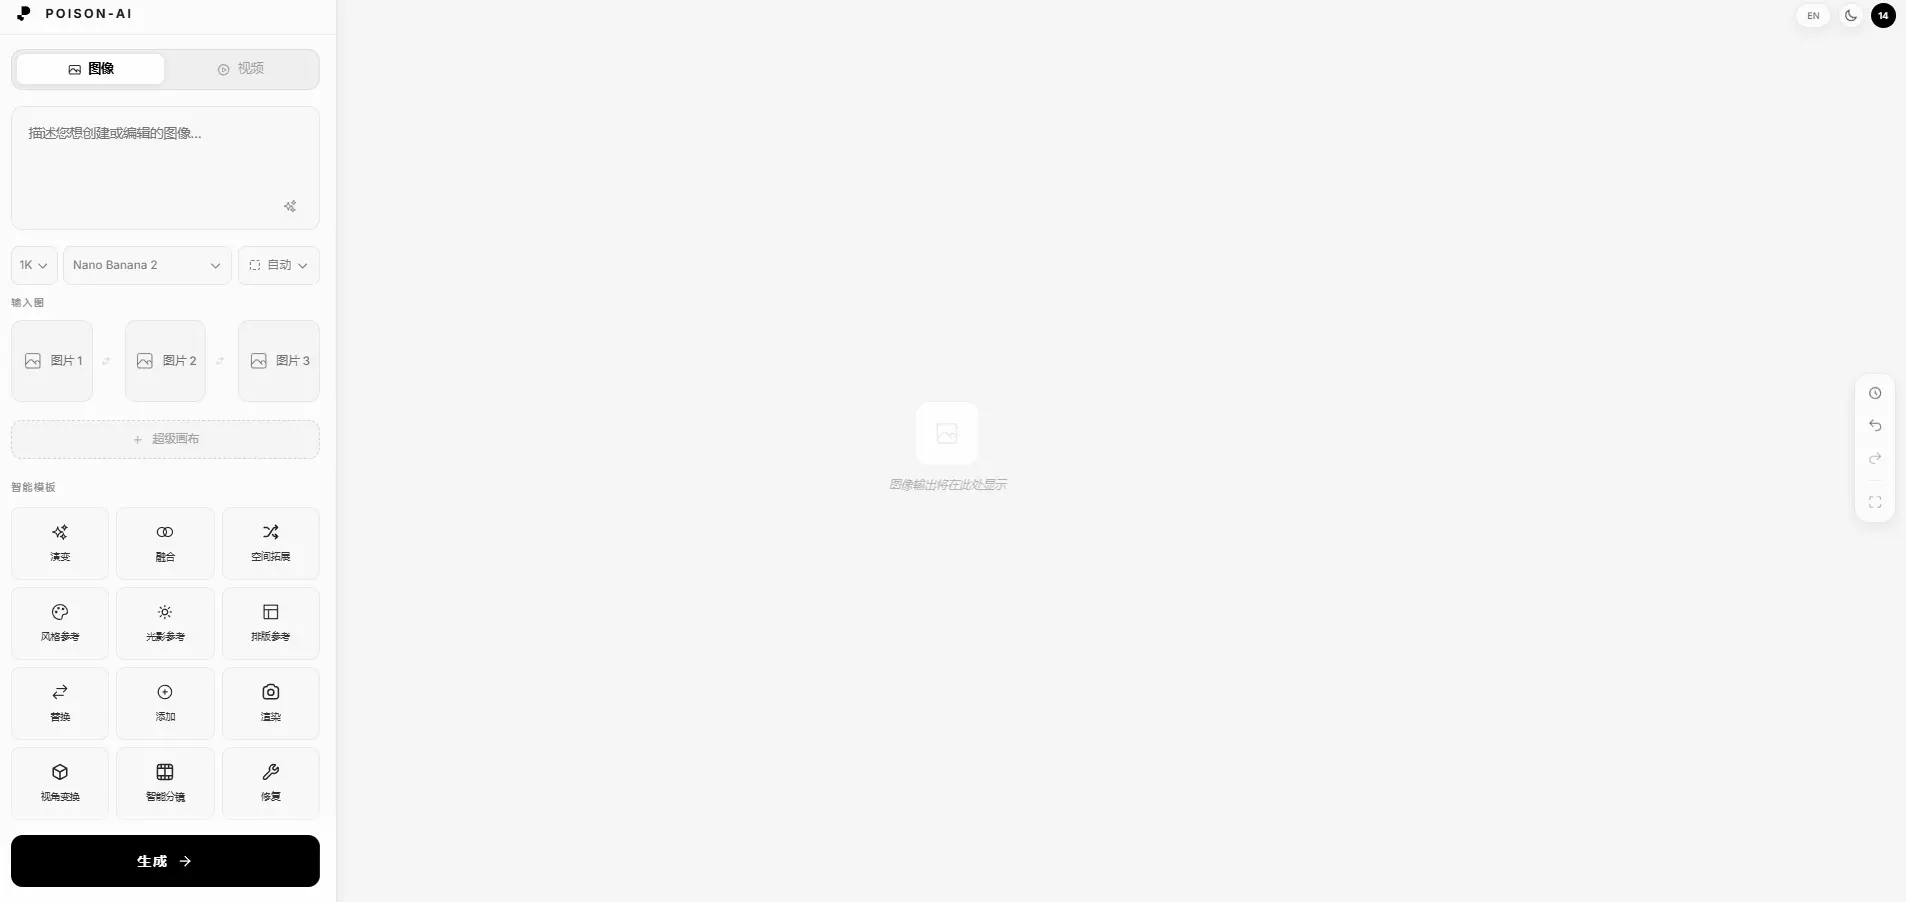
1. Write or choose your prompt
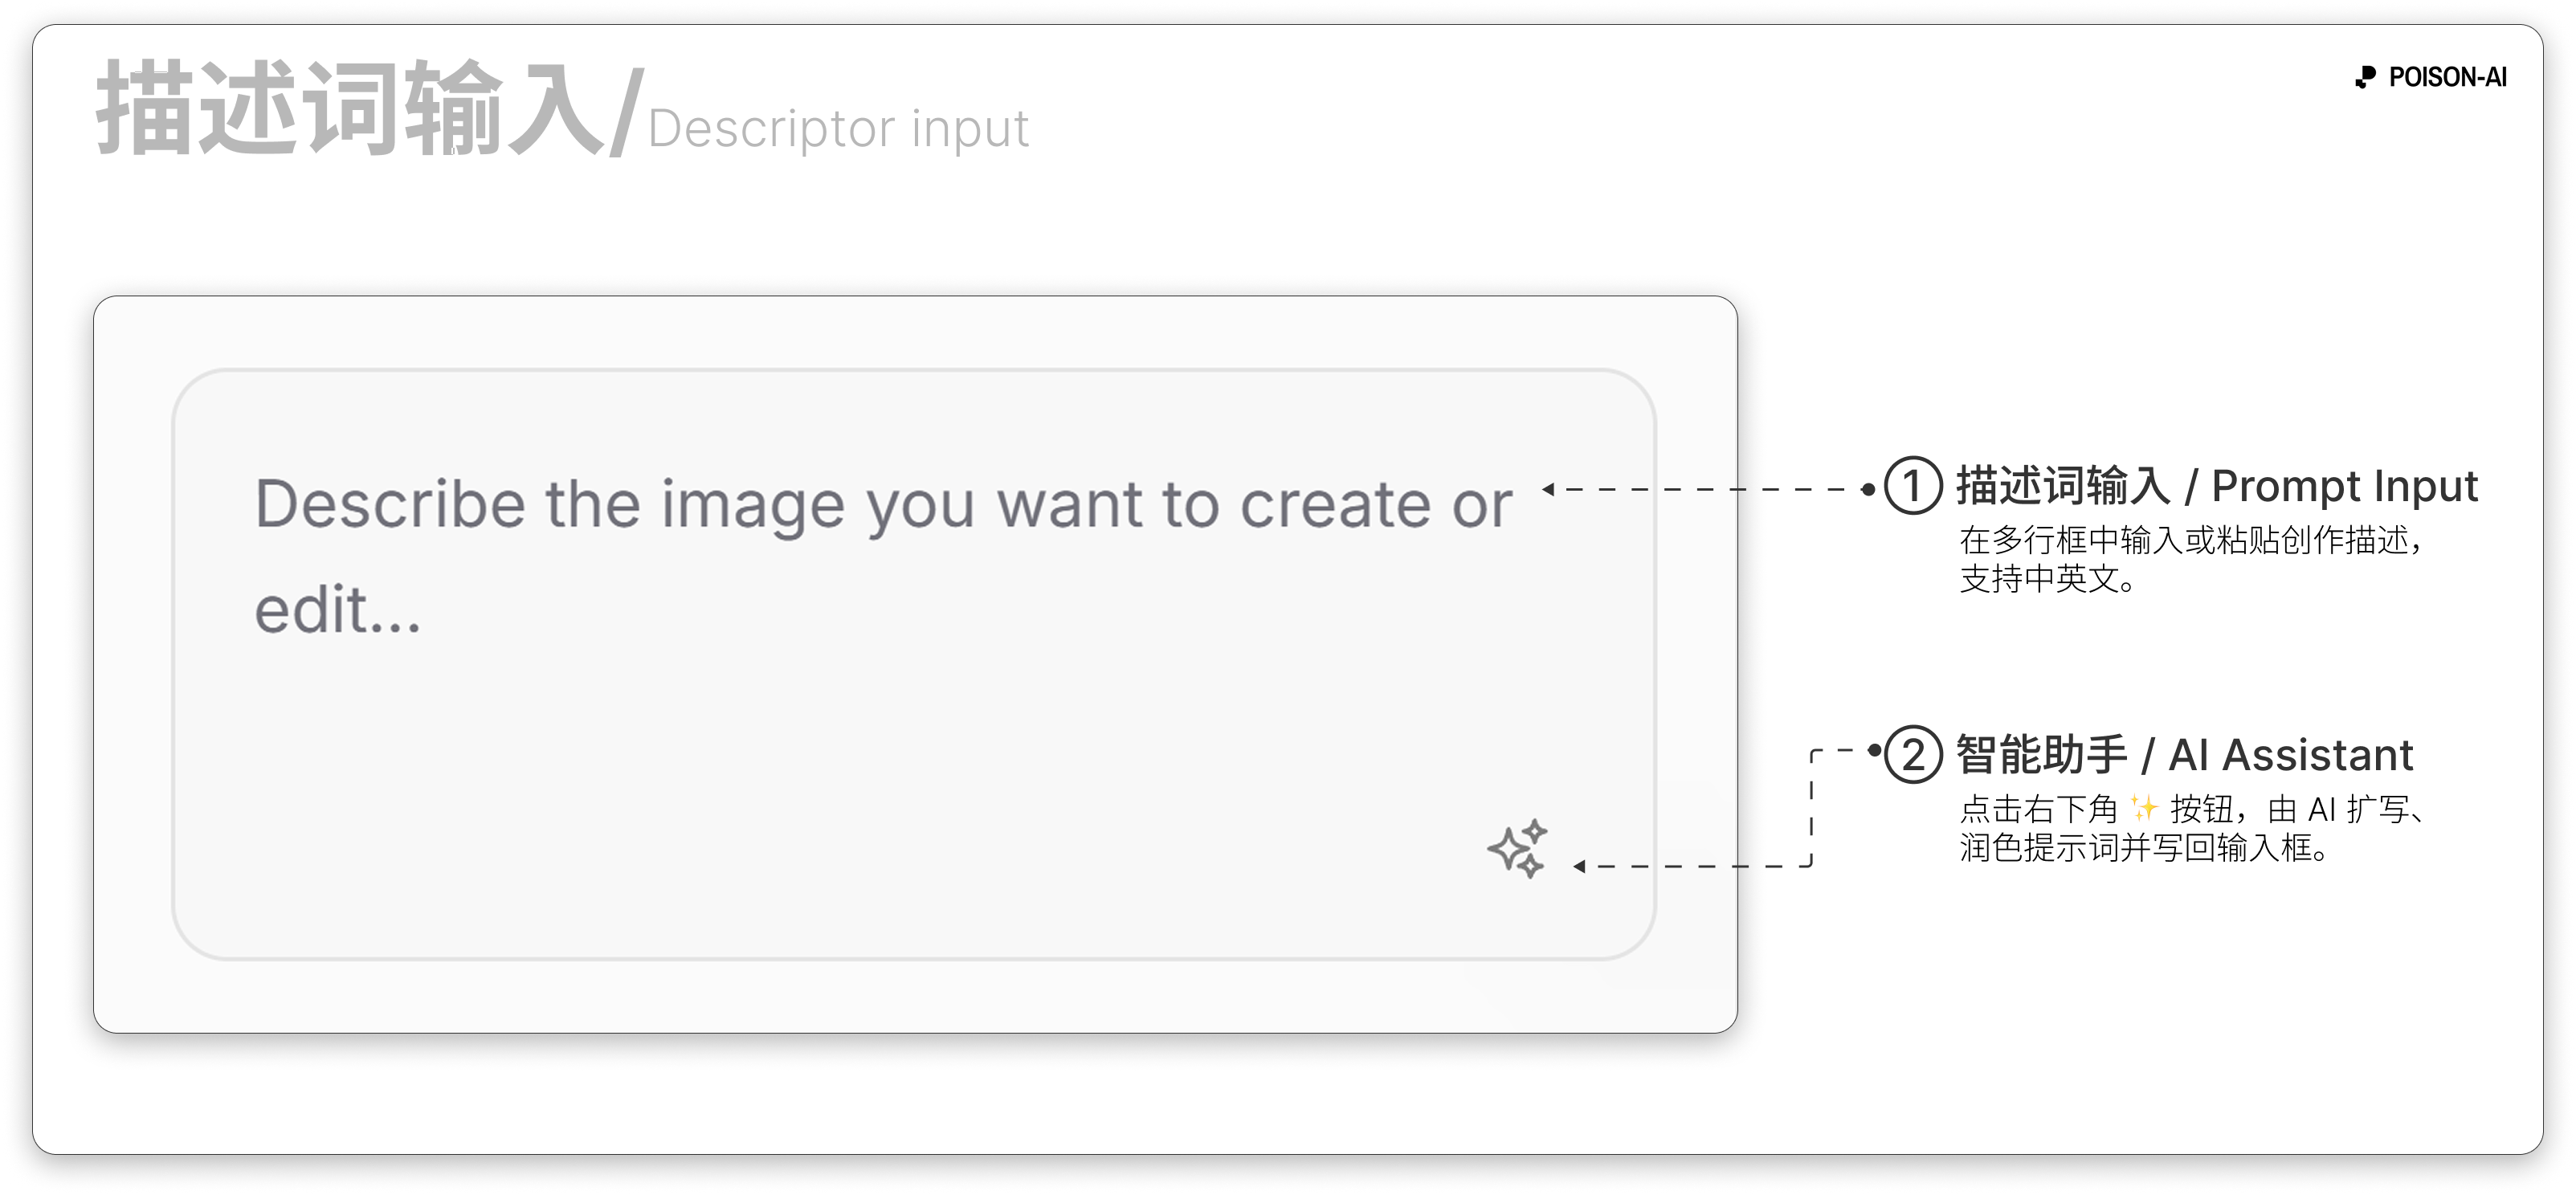
In the main input box on the left, describe the image you want in natural language, e.g. “Modern minimal living room, floor-to-ceiling windows, light gray sofa, plants, afternoon sunlight.”
If you’re not sure what to write, you can upload a reference image first and use image-to-image mode; the prompt can be left empty or short.
2. Choose model and resolution
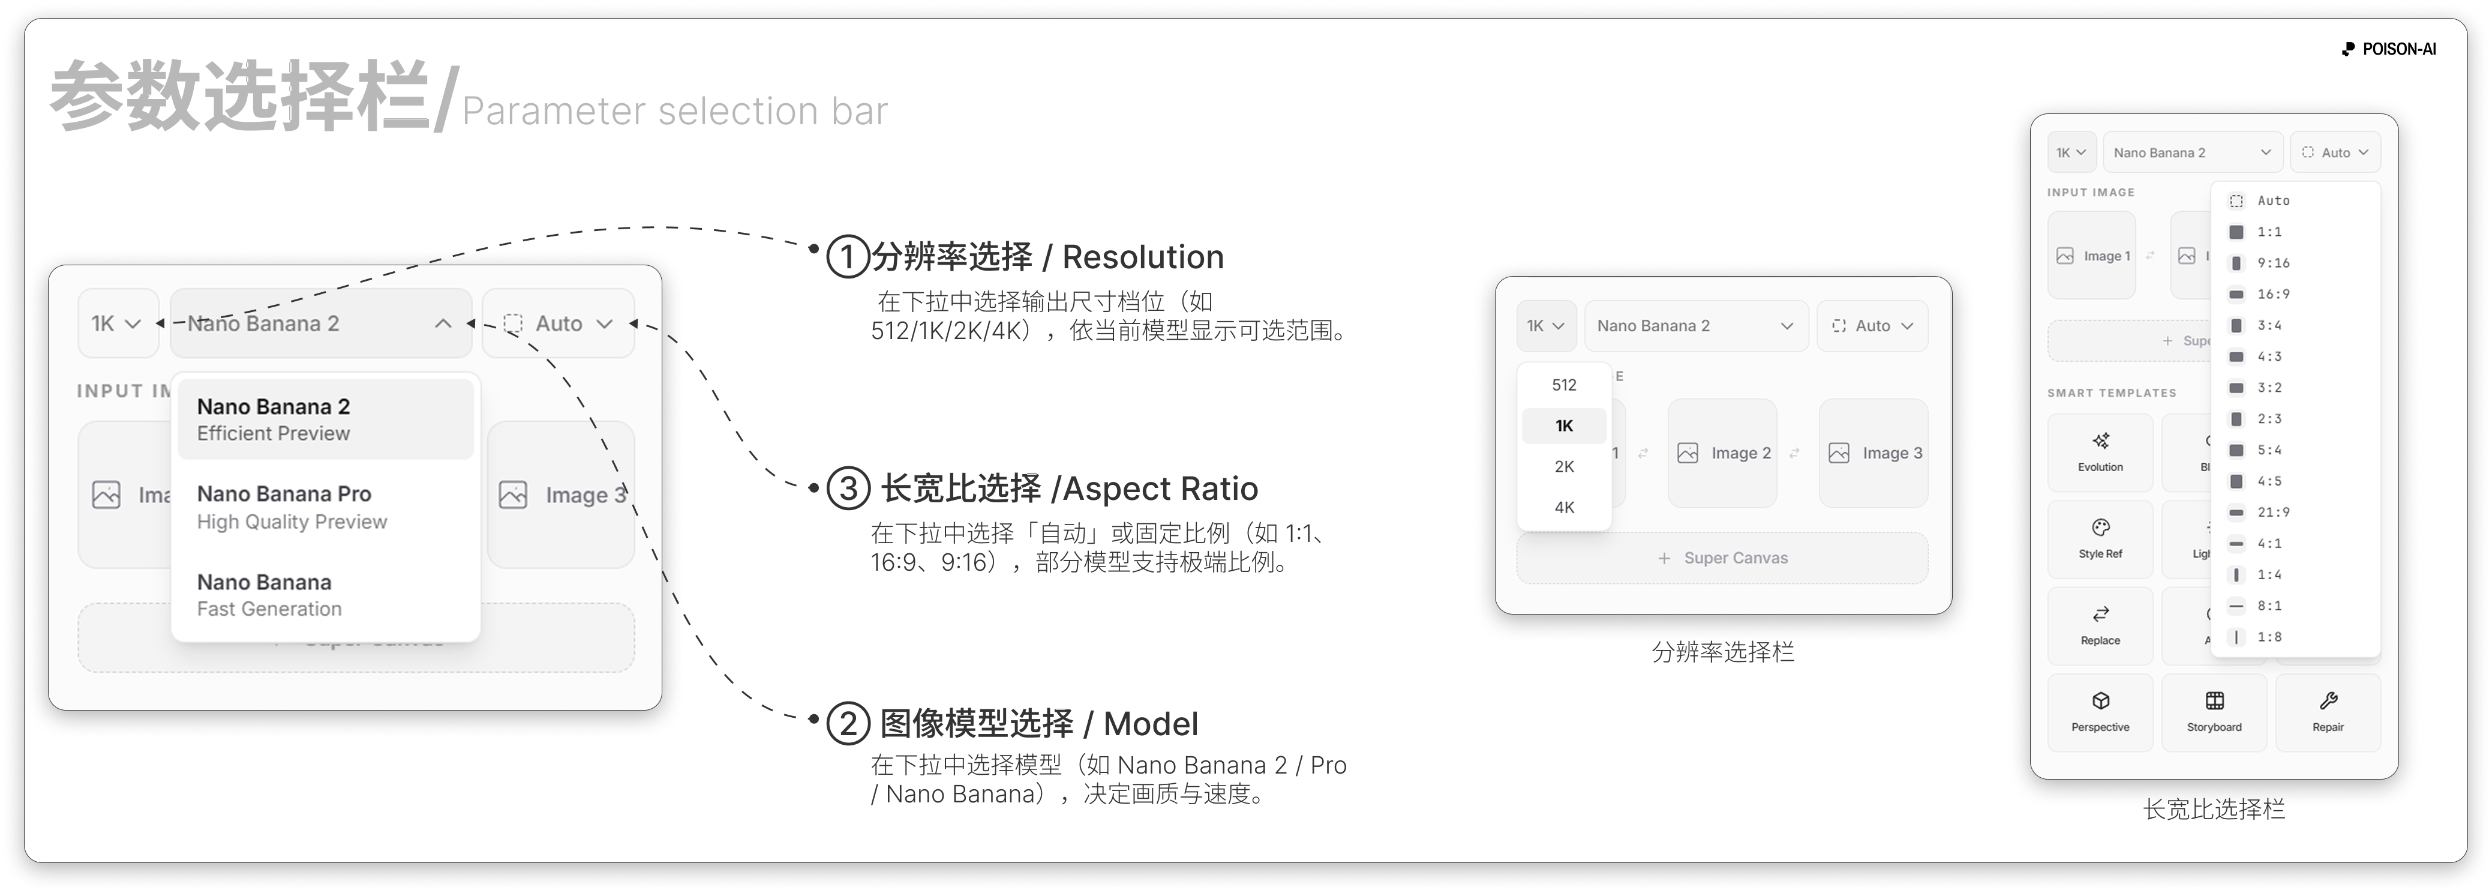
- Image model: Each model trades off speed, style, and quality; pick based on the labels (e.g. base, HD, flagship). The model also affects credit cost per image.
- Resolution: Select an output size in the dropdown; some models support 4K, which uses extra credits.
- Aspect ratio: Choose Auto or a fixed ratio (e.g. 1:1, 16:9, 9:16) for landscape, portrait, or square. Models that support extreme ratios can use 4:1, 1:4, 8:1, 1:8.
3. Optional: upload reference images
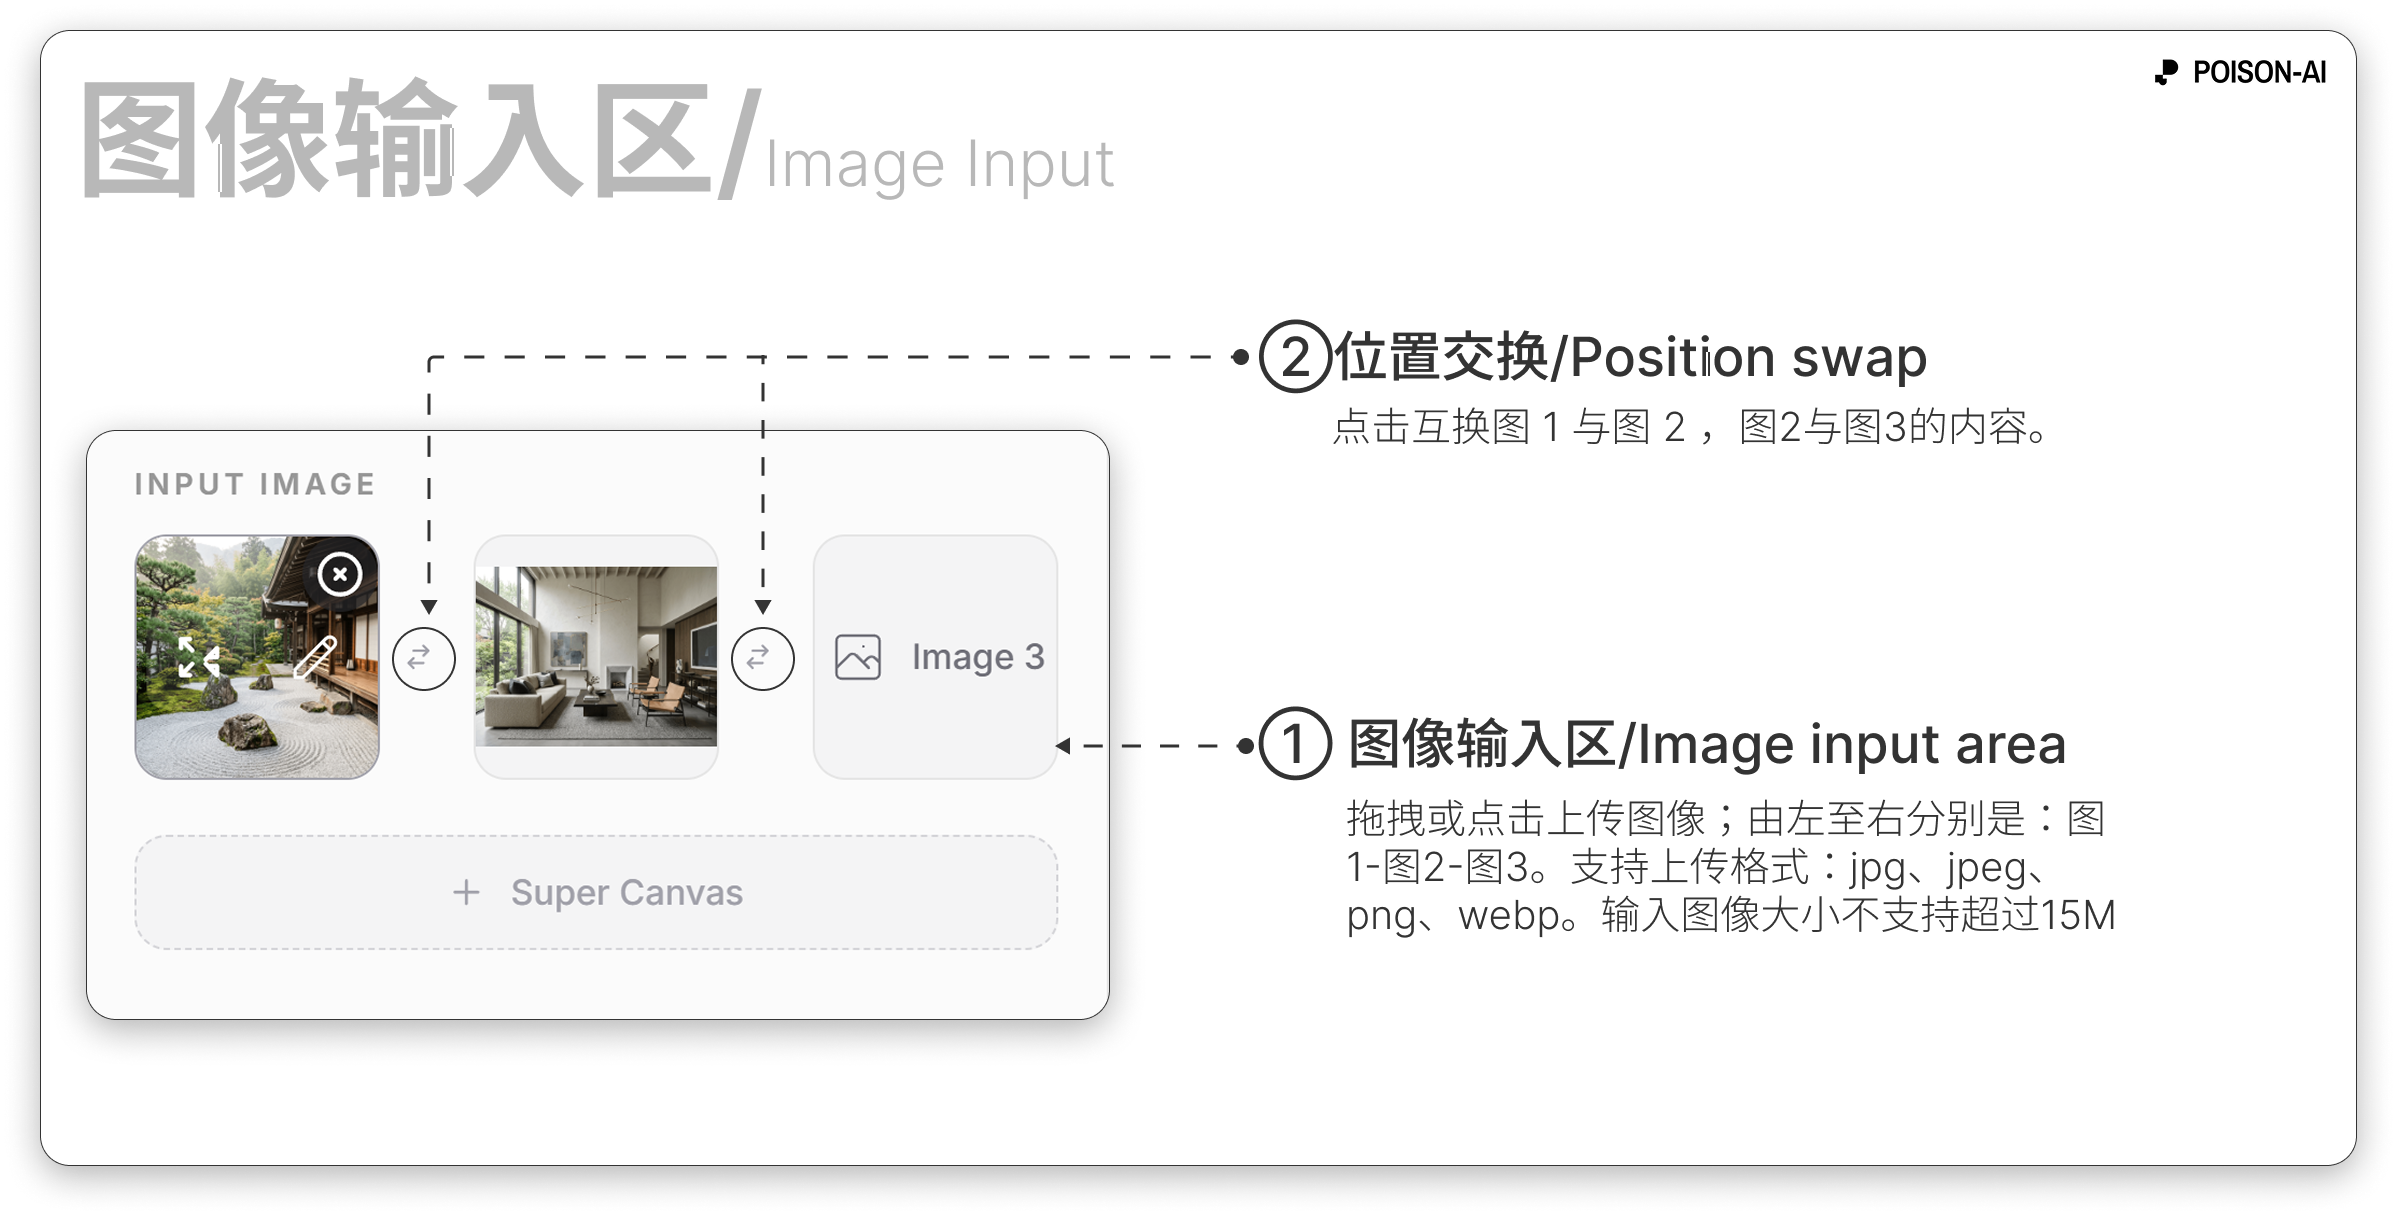
- For image-to-image or two-image Smart Templates, upload in the Image 1 / Image 2 slots. Use Edit on a slot to paint, crop, or add text before generating.
- Max 15MB per image; drag into the upload area or click to select files.
4. Click Generate
When your prompt or images are ready, click the main button to start. The system checks credits and concurrency; if a task is already running, you may hit your plan’s concurrency limit. The button shows a loading state—don’t click again. When done, the result appears on the right canvas.
Tip: To turn a short prompt into a richer one, type a few keywords and use the Smart Assistant below to optimize, then generate.